TL;DR:
- Toxic mold removal involves safely eliminating harmful mold from homes to prevent health issues and structural damage. Professionals must handle mold on porous surfaces or areas larger than 10 square feet, while DIY is suitable only for small, non-porous patches. Proper steps include fixing water sources, sealing the work area, and verifying complete removal with post-remediation testing.
Toxic mold removal is the process of safely eliminating harmful mold growth from your home to protect your health and the structure of your property. The industry term for this work is mold remediation, and it follows standards set by the EPA and the IICRC (Institute of Inspection, Cleaning and Restoration Certification). Left untreated, mold damages drywall, wood framing, and insulation while releasing spores that cause respiratory problems, allergic reactions, and chronic illness. Knowing whether you can handle a patch yourself or need a certified professional is the most important decision you will make in this process.
What is toxic mold removal and when does it apply?
Toxic mold removal applies any time you find mold growth caused by water damage, flooding, plumbing leaks, or persistent humidity. The most commonly feared species is Stachybotrys chartarum, known as black mold, which thrives on cellulose materials like drywall and wood. Not every dark mold is Stachybotrys, but any mold colony large enough to see warrants immediate attention. Mold starts growing within 24 to 72 hours of water exposure on porous materials. That timeline means a flooded basement or a slow pipe leak can produce a serious problem before you even notice the smell.
When can homeowners safely do mold removal themselves?
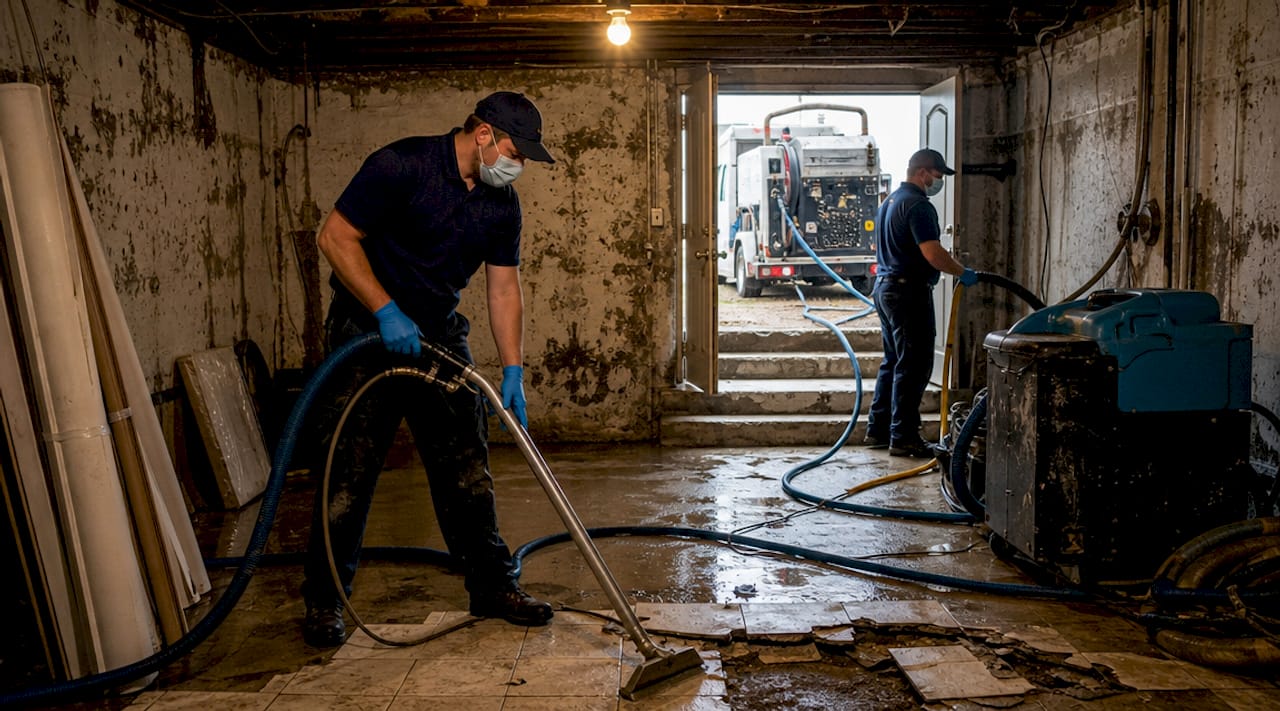
The EPA sets a clear threshold for DIY mold cleanup: patches smaller than 10 square feet on non-porous surfaces are generally safe for homeowners to handle. Ten square feet is roughly the size of a standard ceiling tile. If your mold is on glazed tile, sealed concrete, glass, or metal, you have a reasonable chance of removing it completely on your own.
Porous surfaces are a different story. Drywall, wood studs, ceiling tiles, carpet, and insulation absorb mold deep into their fibers. Surface cleaning on these materials does not reach the root system, so the mold returns within weeks. For porous materials, professional removal is the safer call regardless of patch size.
Before you touch anything, gather the right protective equipment:
- N-95 respirator or better to block airborne spores
- Nitrile gloves extending past the wrist
- Safety goggles without ventilation holes
- Disposable coveralls to prevent cross-contamination
Pro Tip: Seal the work area with plastic sheeting over doorways and turn off your HVAC system before starting. Running forced air spreads spores to every room in the house.
For cleaning non-porous surfaces, hydrogen peroxide mixed with dish soap outperforms peroxide alone. Use a ratio of 3 parts 3% hydrogen peroxide to 1 part dish soap. The soap acts as a surfactant, breaking surface tension so the peroxide penetrates mold cells rather than beading off. Borax dissolved in water is another effective option that leaves a residue hostile to regrowth.
When should you hire a professional for mold remediation?
Professional mold remediation services are required when the affected area exceeds 10 square feet, when mold has reached porous building materials, or when your HVAC system shows signs of contamination. Any of these three conditions means spores have likely spread beyond what you can see. Attempting DIY removal in these situations often makes the problem worse.
The IICRC S520 standard classifies heavy toxic black mold contamination as Condition 3, which requires full personal protective equipment, negative air pressure containment, and HEPA filtration. This is not a standard most homeowners can replicate safely at home. Certified technicians follow these protocols to prevent cross-contamination during the removal process.
Professional mold remediation costs an average of $1,500 to $5,000 for a residential project, depending on size and complexity. That cost is almost always less than the structural repairs caused by mold that was treated incorrectly and allowed to spread.
Conditions that require a professional include:
- Mold covering more than 10 square feet of any surface
- Mold on drywall, wood framing, insulation, or carpet
- Visible mold inside HVAC ducts or air handlers
- Mold returning within weeks of a previous cleanup
- Anyone in the home with asthma, immune deficiency, or mold allergies
The certified mold remediation benefits for families go beyond just removing visible growth. Professionals conduct post-remediation clearance testing to confirm spore counts have returned to safe levels before reconstruction begins.
Step-by-step process for safe mold cleanup and prevention
Safe mold cleanup follows a specific sequence. Skipping steps, especially the first one, causes most failures.
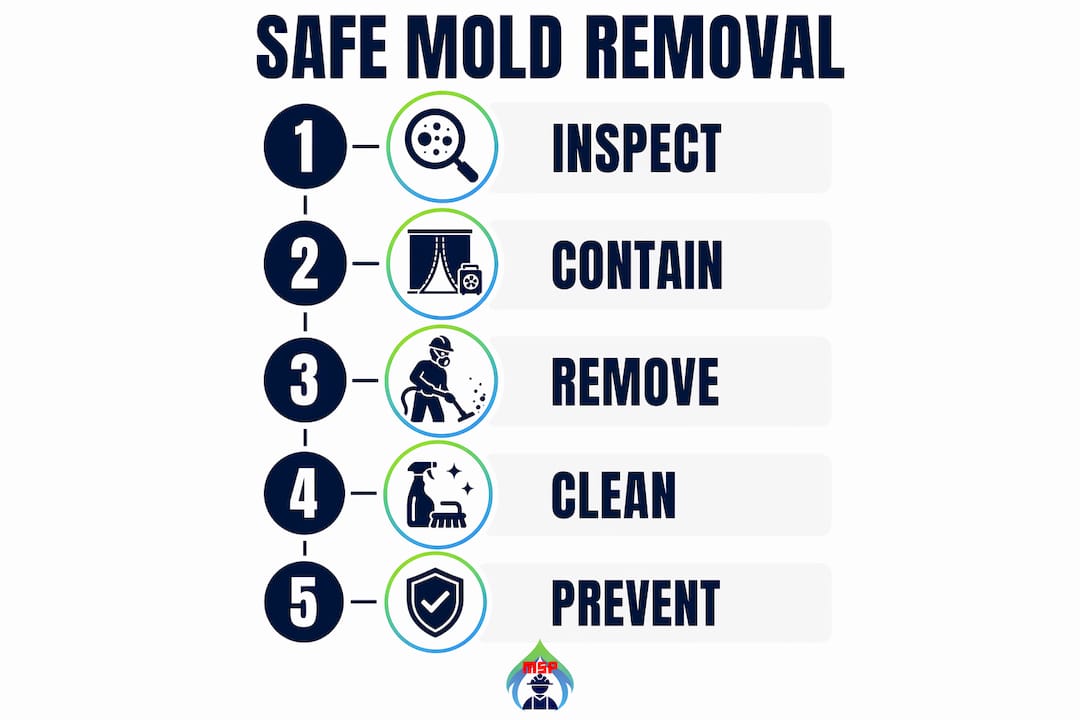
- Fix the moisture source first. Patch the leaking pipe, waterproof the basement wall, or repair the roof before removing a single spore. Untreated moisture sources cause mold to return in 100% of failed remediation cases. No cleaning method works if the water keeps coming back.
- Contain the work area. Seal doorways with 6-mil plastic sheeting and tape. Turn off all HVAC systems. If you have a box fan, set it to exhaust air out of a window to create slight negative pressure.
- Protect yourself. Put on your N-95 respirator, goggles, gloves, and coveralls before entering the space.
- Remove porous materials. Cut out mold-affected drywall and wood. Professionals cut 12 inches beyond the visible mold boundary to capture the full fungal root system. Follow the same standard for DIY work on small sections.
- Clean hard surfaces. Apply your hydrogen peroxide and dish soap solution. Scrub with a stiff brush, let it sit for 10 minutes, then wipe clean. Repeat if discoloration remains.
- Bag and dispose of all waste. Double-bag moldy materials in heavy-duty plastic bags. Seal them before carrying through the house.
- Dry the area completely. Run a dehumidifier and fans until building materials reach their pre-water-event moisture levels. Use a moisture meter to verify readings in wood and drywall before closing up walls.
- Test after remediation. Post-remediation clearance testing by a third-party inspector confirms the job is complete.
Pro Tip: Rent a professional-grade moisture meter from a hardware store. A reading above 16% moisture content in wood means conditions still support mold growth, even if the surface looks dry.
The table below summarizes which surfaces call for which approach:
| Surface type | DIY safe? | Recommended method |
|---|---|---|
| Glazed tile, sealed concrete | Yes (under 10 sq ft) | Hydrogen peroxide + dish soap |
| Painted drywall | No | Cut out and replace |
| Wood framing or studs | No | Professional removal |
| HVAC ducts | No | Certified HVAC remediation |
| Carpet or insulation | No | Full removal and disposal |
Common mistakes that make mold problems worse
The most damaging mistake homeowners make is cleaning the surface without fixing the moisture source. Surface cleaning without moisture control is the primary reason mold returns after removal. The mold looks gone, but the wet conditions feed a new colony within days.
The second most common error is using bleach on porous materials. Bleach does not penetrate porous surfaces deeply enough to kill the root system. The water in bleach actually feeds the mold roots while the chlorine bleaches the surface color. The mold appears gone but regrows faster than before.
Other mistakes that worsen contamination:
- Disturbing mold without containment. Disturbing a mold colony without negative air pressure and sealed containment sends thousands of spores airborne and into adjacent rooms.
- Skipping HEPA vacuuming. After scrubbing, HEPA vacuuming captures residual spores that a regular vacuum would recirculate into the air.
- Not removing enough material. Cutting only to the visible mold edge leaves active root systems in the wall. Follow the 12-inch rule.
- Skipping post-remediation testing. Without clearance testing, you have no way to confirm the job succeeded.
If mold returns within two weeks of cleanup, stop and call a certified professional. Recurring mold signals either an unfixed moisture source or a colony larger than the visible patch.
Key takeaways
Effective mold remediation requires fixing the moisture source first, using the right cleaning method for each surface type, and verifying results with a moisture meter and clearance test.
| Point | Details |
|---|---|
| DIY limit is 10 square feet | The EPA recommends DIY only for patches under 10 sq ft on non-porous surfaces. |
| Fix moisture before cleaning | All failed remediations share one cause: the water source was never repaired. |
| Bleach fails on porous surfaces | Bleach kills surface mold but feeds root systems in drywall and wood. |
| Professionals cut 12 inches beyond visible mold | This standard ensures the full fungal colony is removed, not just the visible patch. |
| Clearance testing confirms success | Post-remediation testing by a third party is the only reliable way to verify the job is done. |
What I’ve learned after years of watching homeowners tackle mold
Most homeowners underestimate how far mold has traveled by the time they see it. The visible patch on the wall is almost always the tip of the colony. The real growth is behind the drywall, inside the insulation, or running along the wood framing. I have seen homeowners scrub a bathroom wall clean, repaint it, and call the job done. Six weeks later the mold is back, darker and larger, because the slow leak behind the shower valve was never touched.
The other thing I see constantly is over-reliance on bleach. People trust it because it makes the surface look clean immediately. That visible result is misleading. On a porous surface, bleach is cosmetic. The mold root system survives and uses the added moisture to accelerate regrowth. Hydrogen peroxide with dish soap is a better choice, and it is available at any pharmacy.
My honest advice: if you are unsure whether the patch is under 10 square feet, or if you find mold on anything other than tile or sealed concrete, call a professional before you start. The cost of a professional assessment is far lower than the cost of a remediation that has to be redone. You can read more about current remediation best practices to understand what a proper job looks like before you decide.
— John
Masterservicepro’s mold and water damage restoration services
Mold problems after water damage rarely stop at the surface. They reach into walls, floors, and structural framing in ways that require certified equipment and trained eyes to find.
Masterservicepro provides full mold remediation and water damage restoration for homeowners and renters across Lake County, Cook County, DuPage County, Will County, and Kane County, IL. Their IICRC-certified technicians follow IICRC S520 standards for containment, removal, drying, and post-remediation clearance testing. Every job is handled from inspection through reconstruction under one roof, so you never have to coordinate between multiple contractors. With a 100% satisfaction guarantee and a track record of five-star reviews, Masterservicepro is the team to call when mold or water damage puts your home at risk. Contact them for an assessment or emergency response today.
FAQ
What is the EPA’s rule for DIY mold removal?
The EPA recommends DIY mold removal only for patches smaller than 10 square feet on non-porous surfaces like tile or sealed concrete. Larger areas or porous materials require professional remediation.
Does bleach kill black mold on drywall?
Bleach does not effectively kill black mold on drywall. It removes surface color but cannot reach the mold’s root system, and the water content in bleach can feed regrowth.
How quickly does mold grow after water damage?
Mold begins growing on porous materials like drywall and wood within 24 to 72 hours of water exposure. Addressing moisture immediately after a leak or flood is critical to preventing mold establishment.
What does IICRC S520 Condition 3 mean for my home?
IICRC S520 Condition 3 describes heavy mold contamination requiring full PPE, negative air pressure containment, and HEPA filtration. This level of contamination requires a certified professional, not DIY methods.
How do I know if mold remediation was successful?
Post-remediation clearance testing by a third-party inspector is the standard method for confirming success. A moisture meter reading below 16% in wood and drywall also confirms the environment no longer supports mold growth.